Greetings!
Welcome to my cable knit pillow tutorial!
So a couple months back I was at Bed Bath and Beyond and stumbled upon this pillow:
Look at the price.... $48.99!
I mumbled to myself something that we've all said before, "I could make that"
So I took some notes, and then that is exactly what I did, and here's how.
Materials:
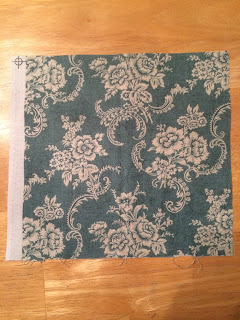
- 1/2 Yard of fabric (cream, a little stretchy)
- Polyfil (not shown in picture)
- TWO skeins of bulky (6 weight) yarn of 108 yards (or more) each
- Size 13 knitting needles
- Yarn needle
- Scissors
- white or cream thread
- sewing needle
- sewing machine
- 16 inch zipper (optional)
Comments:
When a side is referred to as the "front side" that just means
the side that has the purl stitches as the 21 center stitches is facing toward you
(like this photo below)
Front Side:
Step one: Cast on 37 stitches
Step two: Knit 8 stitches, purl 21 stitches, then knit 8 stitches
*Turn*
Purl 8 stitches, knit 21 stitches, purl 8 stitches
Repeat this step until you get seven rows up
(front and back equals two rows)
*If you don't know how to count stitches,
just take a peek at the photo under step four real quick*
*If you don't know how to count stitches,
just take a peek at the photo under step four real quick*
Step three: on the front side purl 8 stitches, then put 7 stitches on your stitch holder,
holding the 7 stitches in the front (refer to photo), knit the next 7 stitches and then
replace your 7 stitches back on your left needle and knit them.
Finish the rest of your row as normal (knit 7 stitches, purl 8 stitches)
Note: If you don't know what the front side is,
just scroll to the top of the tutorial and read the comment
(stitches on stitch holder)
(next seven stitches knit)
(seven stitches returned to the left needle)
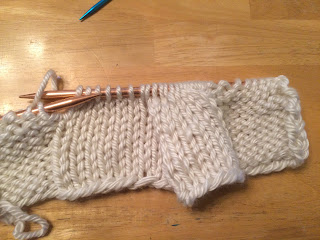
Your cabled row should look like the image above,
but don't fret, after a few rows of regular knitting and purling
it will look more like a cable
Step four:
repeat step two until you get seven rows high.
(this is what your work will look like after 7 rows,
each v is a row)
Step five:
On the front side, purl 8 stitches, knit 7 stitches,
then put 7 stitches on a stitch holder and hold
them in the back (like in the photo)
knit the next 7 stitches and then replace
7 stitches (held in the back) back onto your needles and knit them.
Finish row by purling last 8 stitches
The pictures below illustrate step five:
(stitches held in the back)
(knit 7 stitches)
(put stitches held in the back back onto the left needle and knit them)
(this is what it will look like, see how the braid cable is coming along!)
Step Six:
Repeat step two until you count up seven rows
and then repeat step four
(this is what it will look like after you repeat step four)
Step Seven:
Repeat step two until you count up seven rows
and the repeat step five
Then repeat step two for five rows and then bind off.
It should measure approx. 14-15"
Backside:
Step one:
Cast on 34 Stitches
Step two:
Knit all stitches
Step three:
Purl all stitches
Step Four:
Repeat steps two and three until your work
measures approx. 14-15" tall, or as tall as your
front piece.
Piecing The Knitted Face Together
Marry the front side and the Purled side together (it will look inside out)
and sew up three sides of the four sides with your yarn needle and a long piece of matching yarn (leaving one side open to insert pillow)
The Interior Pillow
Step One:
Lay out your fabric; measure and cut two pieces that are
15" by 15"
Step Two: Sew the two pieces together (pretty sides in)
But on the last side, leave about a 4-5" opening
Step three:
Turn pillow inside out
Step four:
Put polyfil inside of pillow.
Beginning by filling the corners and work your way to the top.
You will want to slowly fill it with handfuls like what is shown in the image below.
Make sure it is as plush as you want!
Give it a good squeeze in a couple of places to check
Step five:
Where your gap is, use your thumb and pull it away
from the body and it should roll in a little bit.
Pinch the rolled bits together and hand sew it shut.
(Your pillow should look like this)
Putting the Pillow and the Knitted exterior together:
Put your sewn pillow inside of the knitted work (turned right side out),
with extra yarn and your yarn needle, sew the fourth side of the knitted pillow shut.
Optional Zipper:
Before you put the sewn pillow inside of the knitted work,
take your 16" zipper and sew it to the open side you left on your knitted work.
Make sure you leave the zipper open a little when you are sewing it on or it'll
be difficult to open up and put your sewn pillow inside of it.
I opted not to do this, because it seemed like a lot of extra work just for the sake
of being able to pull the sewn pillow out; but if you don't like the idea
of washing the pillow and the knitted work together, do the zipper so you can wash them however you want to.
Finished Product!
Thanks for reading
xoxo
Morgan


